Convert a 5K iMac into an External Display
· February 05, 2023 · diy ·
 My 5K iMac, now serving as external display to a 14" M1 MacBook Pro
I recently upgraded from a 2015 27" 5K iMac to an M1 14" MacBook Pro and had planned on trading in my iMac with the purchase. I was, however, surprised to find Apple thinks my iMac is worth $0. Sure the computer inside is getting sluggish and isn't supported with new software updates, but this 5K screen is comparable to a $1.6k Studio Display! Surely that's worth something? It is to me at least.
Not wanting to sell (and more annoyingly ship) the iMac myself, I opted instead to set out to convert my iMac to an external display. It looked like this was possible — if possibly foolish — by ripping out all of the computer equipment within the iMac and replacing it with a new display driver board with your choice of display cables routed out the back. Surprisingly, I managed to successfully convert my iMac into an external display following this process and you can too!
To do so, you're going to need some extra hardware (and some guts).
Prep
Definitely check out Luke Miani's video walking through this process to see what's involved. I'll note I didn't quite score the same deal he did on the display board; I wound up paying around $300 for mine.
If you're still in, here's what you'll need:
- A 3rd party display board. I went with the R1811 option as it seems to support the best range of connections. Mykola Grymalyuk has an excellent walk through of options.
- A screwdriver set with various torx bits. I used iFixIt's set
- iFixIt's Adhesive Strips to reassemble your iMac
- iFixIt's Plastic Cards to help open the display. (This may seem silly when they're practically credit cards, but trust me I destroyed one opening the display. Don't do that to your credit cards.)
- Consider also getting iFixIt's cardboard wedge to hold your iMac's screen in place. I got by without one, but it would have been handy.
- All the cables you'll want to be able to connect to your iMac
- A good pair of tweezers to use with removing & installing screen adhesive
The R1811 board supports DisplayPort, HDMI, and USB-C connections. The latter was tempting, however I came across one or two people in MacRumors forums claiming the USB-C connection had fried a port on their laptop so I opted to primarily use a USB-C to DisplayPort cable. I also ran an HDMI cable through just for flexibility in the future.
Disassembly
Obviously get all your important data off your iMac before beginning and bid it a fond farewell. After this the computer portion will be nothing but a pile of boards and speakers on your work table.
Also if you can, unplug your iMac and let it sit for hours if not days to ensure the power supply's capacitors are discharged. Holding the power button for ten seconds should accomplish this as well. You should still be very careful not to touch them while working, as iFixIt's guides warn many times, but knowing mine had been unplugged for nearly a week let me breathe a little easier.
Not surprisingly iFixIt's tear down guides are invaluable here. They'll walk you through carefully slicing through the adhesive holding the glass display to your iMac and removing the display. From there the innards are exposed for you to remove each piece.
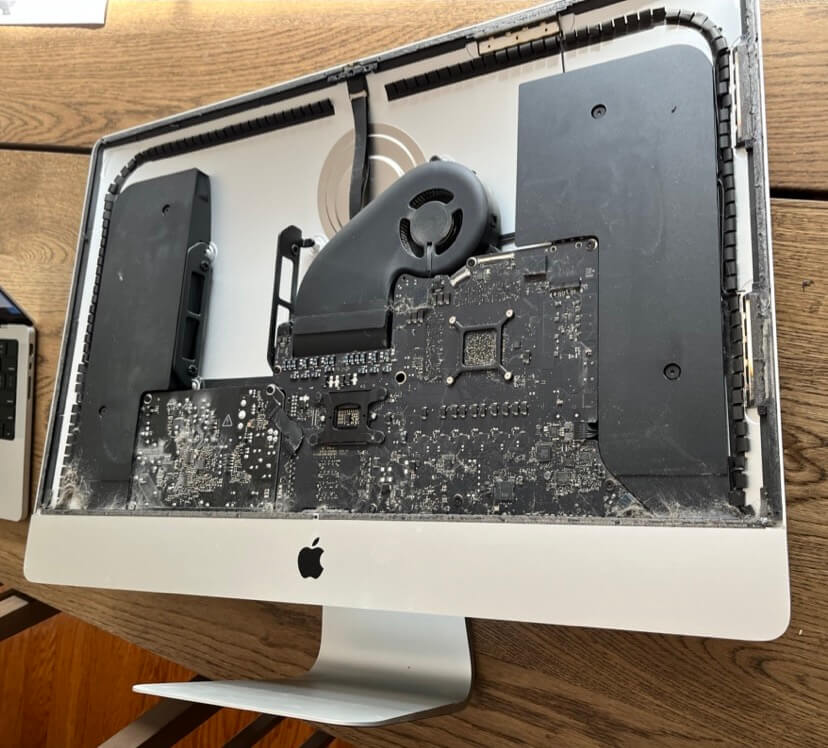 Lovely, 6 years of dust.
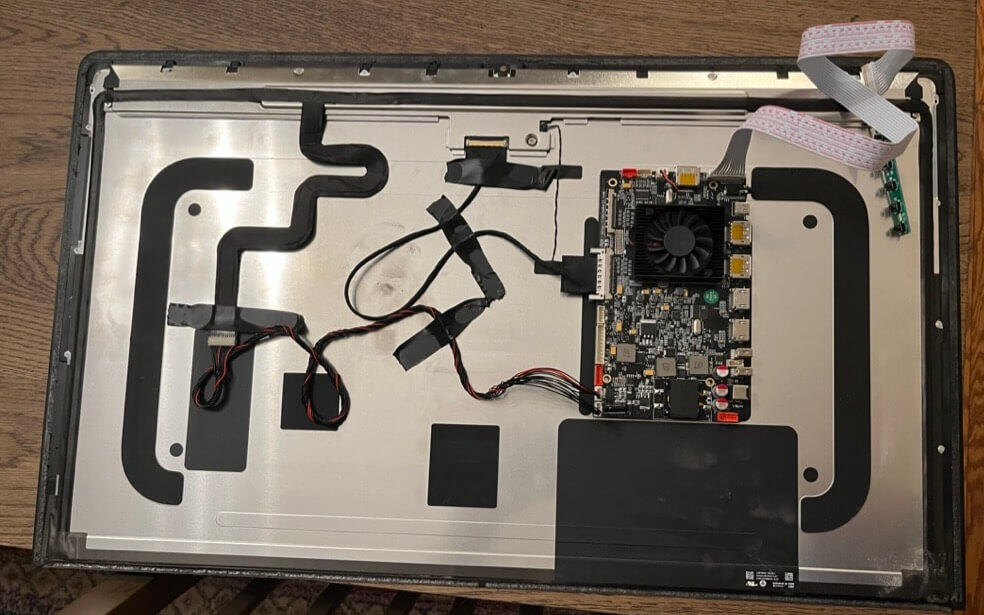
I went roughly counterclockwise, starting with the left speaker, then power supply, right speaker, and logic board. If you have an SSD, be sure to remove it from the rear of the logic board as you may be able to repurpose into a handy external drive. Same goes for the RAM if you have a use for those sticks.
At this point you'll have a mostly empty body shell of an iMac and the separated display.
Connecting the New Board
The iMac display should have two wires still left attached: (1) the display data cable and (2) the backlight cable. These are what you'll attach to the new display board.
For the first, my board came with a new display data cable which completely replaced what was attached to the iMac display. For the backlight, my board came with an adapter which connected with the iMac's cable and routed to two separate connections on the new board.
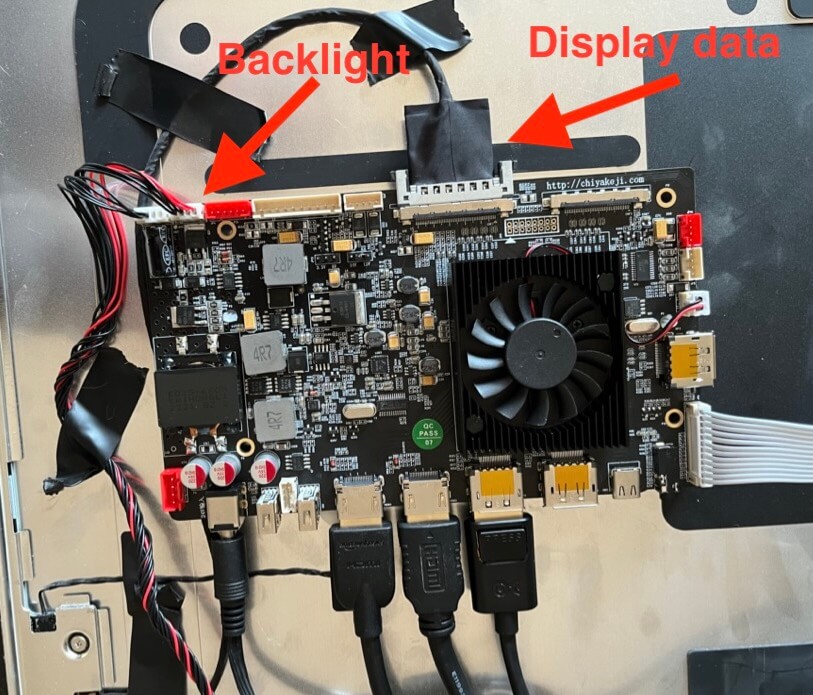 My display board after everything was hooked up.
I was able to connect these to the display while it rested face up on a table, plug in the board to a power supply, and test it out connected to my laptop. It worked! Felt like a Surface Table demo.
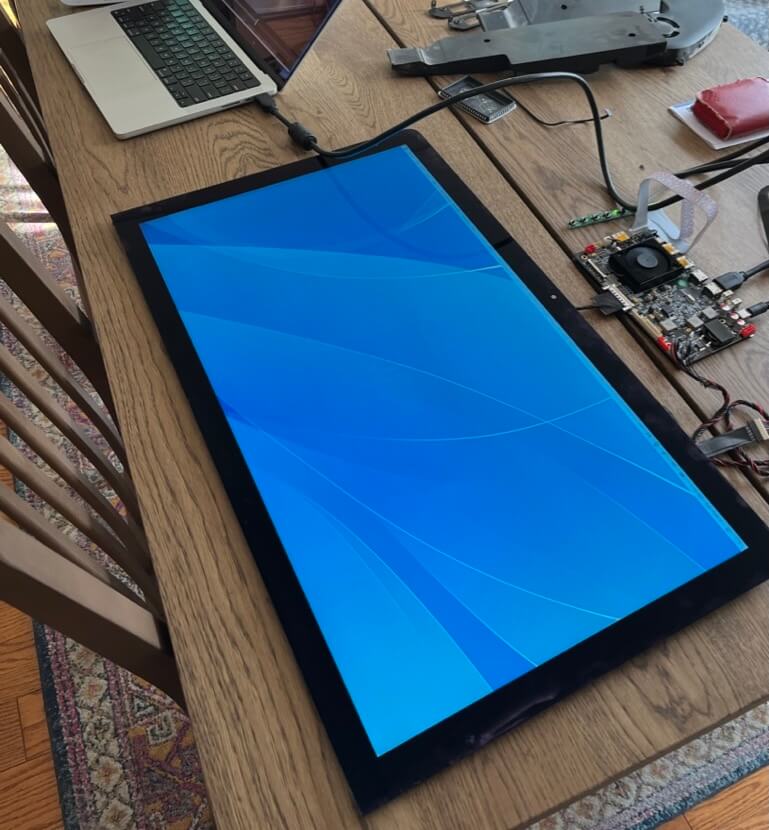 Maybe I could just call this done? Feels futuristic.
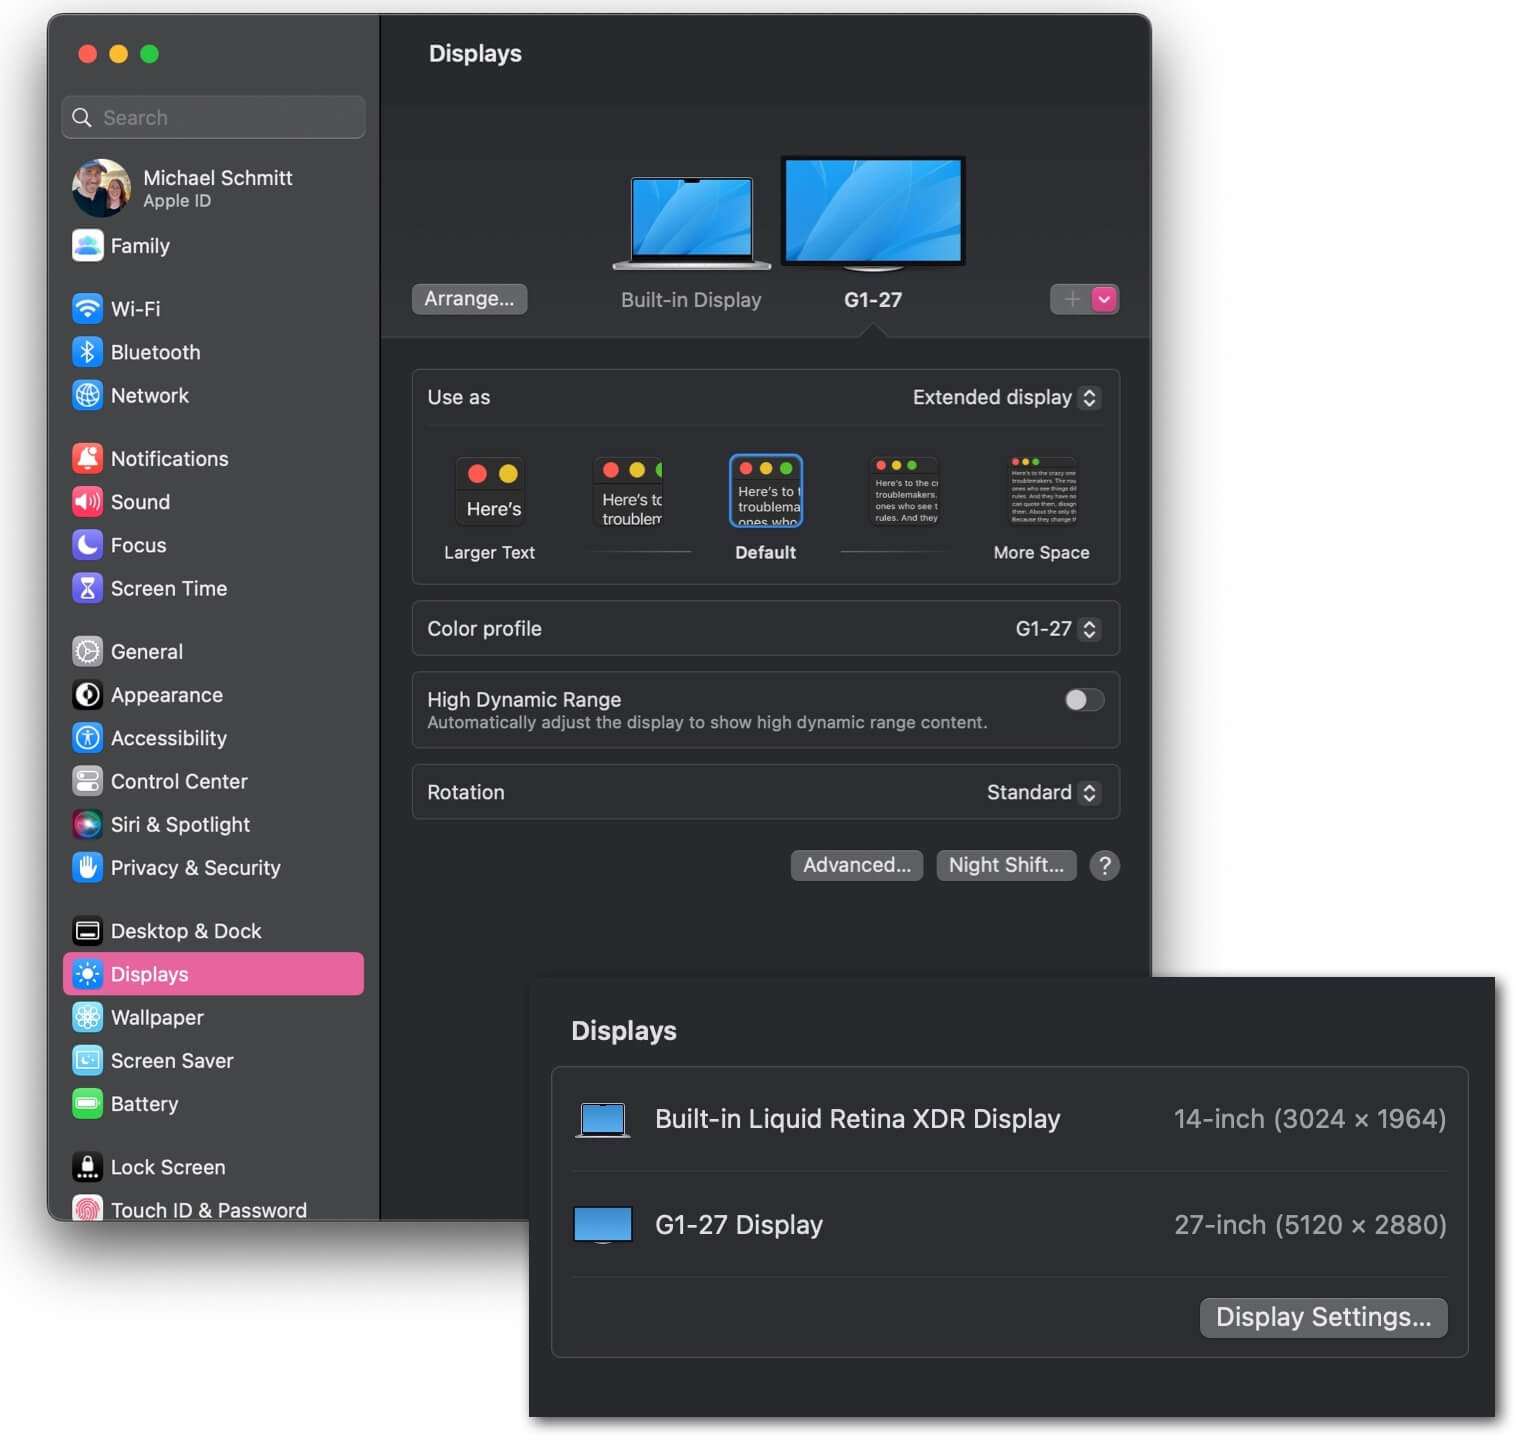 How the new iMac external display appears in my MacBook's display settings.
My board also came with a strip of buttons which turned out to control the display settings, such as switching between inputs. The menu was initially in Chinese but I was able to stumble through to find the language toggle with help from my iPhone's text detection and translation options.
Reassembly
Once I confirmed the board was working as expected with all my cables, I attached the board to the rear of the display with double-sided tape where it would rest on the left side of the iMac. That seemed to be the roomiest spot in the empty body and meant the cables would be close to the RAM access hole.
 The rear of my iMac display with new board. Note I ended up flipping the new board around so the display ports pointed towards the center of the screen and RAM port.
I then carefully put the display back in place, routing the display cables and power cable out the RAM access port and checking to ensure their lengths would be acceptable for connecting various devices. I held the display glass onto the body with painter's tape and tested connecting to my laptop again to ensure nothing had come loose.
I'd recommend stopping at this point for a break if not overnight for two reasons. First, removing the display's adhesive and adding the new adhesive strips took me about 2 hours and I really appreciated not attempting it after several hours of disassembly and testing. Second, you'll want to really think through if you need to get access to that board for any other connections, longer cables, anything at all. You do not want to have to go through the process of slicing through the new adhesive just days later.
Again, iFixIt has a thorough guide on how to apply their adhesive strips which I'd strongly recommend. Here's where the tweezers will pay off! Applying the adhesive was more complex than I was expecting, though at least you don't have to take as much care with steps like avoiding the microphone hole (no more microphone!).
Conclusions
And that's it! I now have a gorgeous 5K 27" external display for my laptop. Both my MacBook Pro and my wife's M1 MacBook Air can drive the display at its full 5K resolution. All told it took me about a weekend from start to finish.
This whole idea definitely has some drawbacks: the rear is uglier than before with lots of cables coming through that large RAM hole, there's a new large power brick that makes transport tricky, not to mention the $300 investment into a computer Apple thinks isn't worth a cent. Plus it still has that iMac chin you could avoid with the new Studio Display.
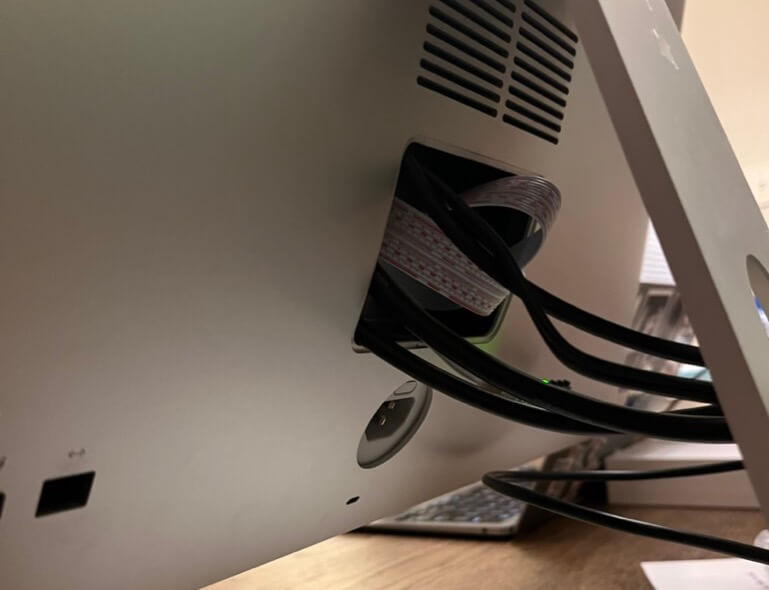 Definitely a step down in the looks department from some angles
But if you enjoy the look of your old 5K iMac it feels like a great way to get more life out of it and not waste that beautiful display.
The entire episode drove home to me the downsides of the all-in-one computer design. Since I purchased this computer in 2016, Apple has jumped lightyears ahead in terms of computing power and features with their new M1 and now M2 silicon. But their display options, minus a few exceptions, are practically the same. The split leaves Intel iMac users in an odd spot: a computer approaching the end of its life welded to a practically new display. I'm glad Apple has offered new powerful, screen-less desktop options in the M2 Mini and Mac Studio so I can avoid being in such a tough spot in the future.
For now, I'll enjoy getting hopefully a few more years' life out of a display I loved.
| Previous | Next |
| Save Your Twitter Likes Without Using the API | Naming Patterns: Delight and Duct Tape |